I was recently inspired by Kilee’s holiday wreath over at One Little Momma. Hydrangeas are my favorite flowers, and I’ve been wanting to make a wreath for a while, so this was just the perfect project for me. I decided to make spring, fall, and Christmas versions.
But I had two potential problems in mind when I started this craft: cost and storage. I didn’t want to spend a fortune on each wreath, and the storage situation in this apartment is mediocre at best (I share a standard closet with my husband, remember?).
I mulled over a few solutions and realized I’d be using the green and cream hydrangeas on each wreath and just changing the third color: blue for spring, burnt orange for fall, and red for Christmas. So the obvious solution was a 3–in–1 wreath!

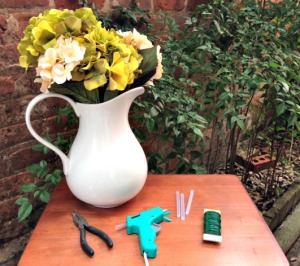
What you’ll need:
ribbon
wire cutters
hot glue gun & glue
floral wire (optional)
and the hydrangeas you’ll attach permanently (for me, that’s cream and green)
Hydrangeas you’ll switch:
2 blue
2 burnt orange
2 red
and keep the leaves, too

And a grapevine wreath, of course. I got this one at JoAnn for $3 (cost breakdown at end of post). If you want a full wreath with lots of flowers, you could probably get away with a less expensive foam wreath form, but I wanted to space my hydrangeas out a bit more, so I went with the grapevine because it looks nice. It also works really well for switching out the hydrangeas each season.

What to do:
Pop off the leaves from each hydrangea stem and set aside. We’ll use those in a minute.
Next, use the wire cutters to cut each hydrangea stem. Leave about 2 inches at the base of each stem, then fold those 2 inches to the side.

Figure out where you want the ribbon on your wreath. You’ll probably need to try hanging it to see where the center is, where it’s easiest to hang using whatever method you’re using, etc. Do this first! It’s much better to know how the wreath will hang BEFORE you glue anything to it.
After you’ve got your ribbon in place, space out the hydrangeas and leaves the way you want them. You can go for a full look with lots of flowers, or space them out a bit and balance the flowers with the leaves and grapevines. I used one of the colors I planned to swap out to help me with spacing, then glued down everything permanent (the leaves and the cream and green hydrangeas).
Helpful hint: Make sure the wraparound vine is available for the flowers you will switch out.

The grapevine wreath is great for holding items in place. You may not need the floral wire at all.
Now, remember that delightful wraparound vine?

Use that as the base for the flowers you’ll switch. You can easily tuck the 2 inch stem into the wraparound vine, then fluff the flower the way you want it.
If you’re planning to put the wreath outside, you’ll need to use some floral wire to secure the flowers you’ll switch. If the wreath will be inside, you can probably get away with skipping this step.
The final product
Here she is all dressed up for spring:

and fall:

and Christmas:

And the best part? All I have to store are the extra flowers:

Cost breakdown:
Okay, here’s where it gets really crazy! I was determined to make this wreath on a shoestring budget, so I got on the internet and started comparing prices, printing coupons, even planning a driving route for errands! It’s the closest I’ll ever come to extreme couponing (I don’t have anywhere to store 80 cans of green beans or 40 bottles of Windex).
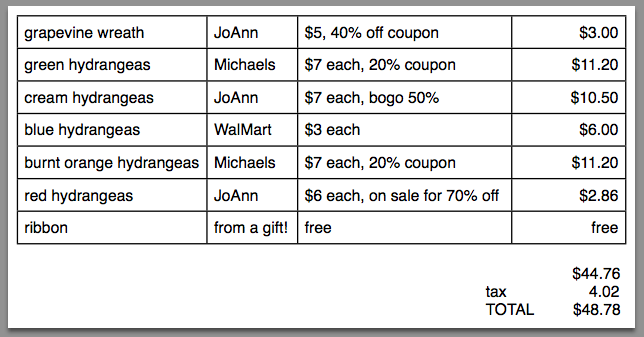
Or about $16 per wreath. : )
I hope you enjoyed this tutorial! Any budget–friendly decorating ideas? I’d love to hear them!